Follow Us!
Bennett Property Inspection | High Quality Home Inspections
  • Home
  • Inspection Services
    • Pricing
    • Home Inspections
    • Additional Inspections
    • Commercial Inspections
    • Four (4) Point & Wind Mitigation
  • About
    • Meet Kevin
    • Testimonials
    • What We Inspect
    • What Is In The Report
    • The Inspection & FAQ's
    • InterNACHI Member
    • Tampa Bay InterNACHI
  • Resources
    • Cost of Repairs
    • Links
    • Helpful Videos
  • Contact the Inspector
  • Blog

Formaldehyde

3/20/2015

0 Comments

 
Picture
Recently a 60 minutes report accused Lumber Liquidators of selling hardwood flooring products from China containing high levels of formaldehyde, mounting customer concern compelled the national retailer to react. Though the chemical is classified as a known carcinogen, its health effects are not completely understood. The company has since sent thousands of free testing kits to consumers to detect formaldehyde levels.


Formaldehyde is a colorless, pungent-smelling chemical widely used in industries that manufacture building materials and numerous household products. Thus, it may be present in substantial concentrations in indoor environments.

Where indoors may formaldehyde be found?

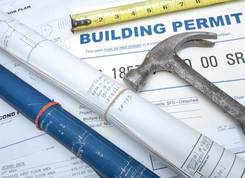
  • pressed-wood products (such as hardwood plywood wall paneling, particle board and fiberboard), and furniture made with these pressed-wood products. Mobile homes are especially at risk for indoor formaldehyde pollution because of their abundance of composite wood in construction, and relatively compact interior space;
  • carpet backing and urea-formaldehyde foam insulation (UFFI).  In the 1970s, many homes were insulated with UFFI as an energy-conservation measure before it was discovered that UFFI contained dangerously high levels of formaldehyde.  Fortunately, formaldehyde emissions in this product decline over time, so older houses with UFFI are unlikely to have high levels of formaldehyde now. This insulation is not very common in modern housing;
  • tobacco smoke;
  • durable-press drapes and other textiles;
  • un-vented, fuel-burning appliances, such gas stoves and kerosene space heaters; and
  • glues.

Is it dangerous?


Four years after concern arose over high levels of formaldehyde found in some FEMA trailers, there is still a great deal of confusion regarding permissible levels of airborne formaldehyde in indoor environments. 

Formaldehyde is known to cause the following conditions:
  • watery eyes;
  • burning sensations in the eyes and throat;
  • nausea;
  • wheezing, coughing and difficulty breathing; 
  • asthma attacks;
  • fatigue;
  • skin rash;
  • severe allergic reactions; and
  • cancer. Uncertainty remains as to how to compare measured air concentrations of formaldehyde to cancer incidence.  No definitive "high risk" level can be drawn because many other factors besides formaldehyde exposure play a role in the development of cancer. In general, however, the lower the level and shorter the duration of exposure, the less risk of cancer and other health effects there are. 

In 1992, the California Air Resources Board (CARB) declared formaldehyde a "toxic air contaminant," meaning that there is no safe level of exposure. In June 2004, the International Agency for Research on Cancer (IARC) reclassified formaldehyde from “probably carcinogenic to humans” to “carcinogenic to humans,” specifically concerning nasopharyngeal (upper throat) cancer, while the National Toxicology Program (NTP) continues to classify formaldehyde as “reasonably anticipated to be a carcinogen in humans” for nasopharyngeal cancer.

Steps to Reduce Exposure
  • Use exterior-grade pressed-wood products (lower-emitting, because they contain phenol resins, not urea resins).
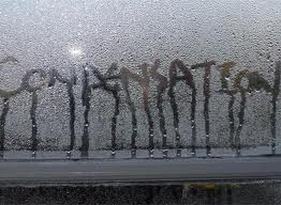
  • Use air conditioning and dehumidifiers to maintain a moderate temperature and reduce humidity levels.
  • Increase ventilation, particularly after bringing new sources of formaldehyde indoors.
  • Seal non-laminated surfaces of products containing formaldehyde with paints, varnish or polyurethane-like materials. 

In summary, formaldehyde is an irritating and potentially dangerous gas that may accumulate in indoor environments.  

For questions concerning property inspections, or to schedule your property inspection, contact Bennett Property Inspection today at (813) 260-9920.

0 Comments

Spring into Action

3/6/2015

0 Comments

 
Picture

One of the biggest signs that winter is officially over is scheduled to take place this week, and no we aren't talking about Rays, Yankees or Phillies Spring Training. We’re referring to the start of Daylight Savings Time. This Sunday marks the unofficial end of winter with the spring time change. At 2:00 a.m. on March 8th, it is time to “spring forward” and inevitably roll out of bed cranky from losing that oh so precious extra hour of sleep. 

With daylight savings time leading the way to the official first day of Spring on March 20th, we might as well get a jump start on some of the chores that have eluded us for the last several months.


Brighten Your Home With These Five Spring Cleaning Tasks:

1. Wash the Windows.  A clear view brightens the entire house!  A simple way to do this is by removing the screens and brushing them clean with a broom.  Clean them using a hose with a multi-surface cleaner, and spray clean.  Making sure all windows are shut, use a window cleaner that attaches directly to your hose to spray exteriors of the windows clean.  But we think an even easier way to clean windows is to hire someone to do it for you! So worth the phone call to a professional!

2. Clean the Carpets and Rugs. Start with a fresh step! Cleaning your carpets and rugs makes the whole house feel cleaner and mists the air with scent that says “fresh.” You can rent carpet cleaners from any home improvement store for about $25 per day, or opt have someone come out and shampoo your rugs for $100-$150 for three areas.

3. Give the refrigerator a once-over. A healthy house begins with healthy dwellers.  Refrigerators are breeding grounds for bacteria and mold. Start by tossing any forgot about or expired condiments or food items.  Remove the remainder of the contents from the refrigerator and remove the shelves and drawers.  Wash these in the sink or dishwasher, then give the sides of the fridge a good wipe down. A clean fridge is just begging to filled with delicious and nutritious eats from the Farmer’s Market.

4. Clean the Floorboards, Doors, and Woodwork.  What’s not directly in front of us often gets neglected, yet floorboards, doors, and woodwork are some of the most abused components of our house.  They get kicked by shoes, scratched at by dogs, spilled on by kids, and touched by many hands.  With a clean cloth dipped in solution of water and a few drops of dish soap (wrung dry), run the cloth along the tops and fronts of each floor board.  Start at the bottom left side of the room and work your way around, stopping to wipe down any doors, window sills, or other woodwork along the way.  Don’t forget to sanitize the door handles and light switches as well.

5. Touch-Up Painted Walls.  Just as floorboards, doors and woodwork often get neglected, so does the everyday wear and tear on walls.  Use this time as an opportunity to clean spills and stains off the walls with a clean cloth (dipped in water with a couple drips of dish soap).  Once clean, scour the walls for areas that need touch up paint.  Start at the top left corner of each room and work your way down and to the right. Fill in any nail holes with spackling, then touch up with paint.

Who says that spring cleaning needs to take days to complete?  These five, low-effort spring cleaning tasks can have your home looking, and smelling like new without exhausting yourself cleaning room-by-room.

For questions concerning property inspections, or to schedule your property inspection, contact Bennett Property Inspection today at (813) 260-9920.
0 Comments

To Permit Or Not To Permit...That Is The Inspection Question

3/2/2015

0 Comments

 
Picture
At least once a week I have a client ask me if a particular project needs permitting or not. So to help them out and you, I have assembled this handy list for residents that fall within the City of Tampa. 

Residential Work Not Requiring A Permit
  • Minor, non-structural repairs, which does not include the cutting away of any wall, partition or any part thereof, with the approval of the building official or his designee
  • Repair faucets or valves, and unstop clogged drains and sewer lines.
  • Install A/C units (less than 3 tons), not connected to ducts.
  • Painting, cabinets, carpet, vinyl tile, and gutters, and certain types of fences.
  • Removal of trees not on the protected list such as Male Mulberry, Australian Pine, Eucalyptus, Chinaberry, Cherry Laurel, Brazilian Pepper, Monkey Puzzle, and Silk Oak

Residential Work Requiring A Permit
  • New construction, additions, remodeling of any building or building system
  • Demolition work
  • New roof covering or the replacement of roof coverings over 500 square feet
  • Stucco or siding work over 500 square feet
  • Any work associated with changing the occupancy of a building
  • Residential accessory building and residential driveways over 150 square feet
  • Any gas work
  • Any mechanical work except for self-contained air conditioning units three tons or less with a factory-installed cord or plug
  • Plumbing work on any building, water/sewer lines, septic tanks, wells and fire lines
  • Any electrical work
  • Tree removal or trimming
  • Grade or fill work
  • Site clearing greater than 500 square feet


For questions concerning property inspections, or to schedule your property inspection, contact Bennett Property Inspection today at (813) 260-9920.


0 Comments

Attached Garage Fire Hazards

2/24/2015

0 Comments

 
Picture
Attached Garage Fire Hazards
 
At Bennett Property Inspection, we’d like you to take measures to keep your garage free from fire. Fortunately, there are ways this can be done, some of which are described below. Secondly, garage fires do happen, and we’d like you to make sure that a fire cannot not easily spread to the rest of your house. While you can perform many of the recommendations in this article yourself, you can also consult with Bennett Property Inspection to make sure your home is safe from a garage fire.

 
Why do many garages pose a fire hazard?
  • Where are you most likely to do any welding, or any work on your car? These activities require working with all sorts of flammable materials.
  • Water heaters and boilers are usually stored in garages, and they can create sparks that may ignite fumes or fluids. Car batteries, too, will spark under certain conditions.
  • Oil and gasoline can drip from cars. These fluids may collect unnoticed and eventually ignite, given the proper conditions.
  • Flammable liquids, such as gasoline, motor oil and paint are commonly stored in garages. Some other examples are brake fluid, varnish, paint thinner and lighter fluid.

The following tips can help prevent garage fires and their spread:
  • If the garage allows access to the attic, make sure a hatch covers this access.
  • The walls and ceiling should be fire-rated. Unfortunately, it will be difficult for untrained homeowners to tell if their walls are Type X fire-rated gypsum. We can examine the walls and ceiling to make sure they are adequate fire barriers. 
  • The floor should be clear of clutter. Loose papers, matches, oily rags, and other potentially  flammable items are extremely dangerous if they are strewn about the garage floor.
  • Use light bulbs with the proper wattage, and do not overload electrical outlets.
  • Tape down all cords and wires so they are not twisted or accidentally yanked.

If there is a door that connects the garage to the living area, consider the following:
  • Do not install a pet door in the door! Flames can more easily spread into the living area through a pet door, especially if it’s made of plastic.
  • Does the door have a window? We can inspect the window to tell if it's fire-rated.
  • The door should be self-closing. While it may be inconvenient, especially while carrying groceries into the house from the car, doors should be self-closing. You never know when a fire will happen, and it would be unfortunate to accidentally leave the door open while a fire is starting in the garage.
  • Check the joints and open spaces around the door. Are they tightly sealed? Any openings at all can allow dangerous fumes, such as carbon monoxide or gasoline vapor, to enter the living area. Bennett Property Inspection can recommend ways to seal the door so that fumes cannot enter the living area.

Concerning items placed on the floor, you should check for the following:
  • Store your flammable liquids in clearly labeled, self-closing containers, and only in small amounts. Keep them away from heaters, appliances, pilot lights and other sources of heat or flame.
  • Never store propane tanks indoors. If they catch fire, they can explode. Propane tanks are sturdy enough to be stored outdoors.

In summary, there are many things that you can do to prevent garage fires from spreading to the rest of the house, or to keep them from starting in the first place. However, it is highly recommended that you have your garage periodically examined by a licensed professional and certified InterNachi Inspector.

For questions concerning property inspections, or to schedule your property inspection, contact Bennett Property Inspection today at (813) 260-9920.

Article Source:InterNACHI

0 Comments

Asbestos

2/13/2015

0 Comments

 
PictureClose Up of Asbestos
What is Asbestos? 
Asbestos is a mineral fiber that can be positively identified only with a special type of microscope. There are several types of asbestos fibers. In the past, asbestos was added to a variety of products to strengthen them and to provide heat insulation and fire resistance. InterNACHI inspectors can supplement their knowledge with the information offered in this guide. 

 
How Can Asbestos Affect My Health? 
From studies of people who were exposed to asbestos in factories and shipyards, we know that breathing high levels of asbestos fibers can lead to an increased risk of lung cancer in the forms of mesothelioma, which is a cancer of the lining of the chest and the abdominal cavity, and asbestosis, in which the lungs become scarred with fibrous tissue.
 
The risk of lung cancer and mesothelioma increase with the number of fibers inhaled. The risk of lung cancer from inhaling asbestos fibers is also greater if you smoke. People who get asbestosis have usually been exposed to high levels of asbestos for a long time. The symptoms of these diseases do not usually appear until about 20 to 30 years after the first exposure to asbestos. 

Most people exposed to small amounts of asbestos, as we all are in our daily lives, do not develop these health problems. However, if disturbed, asbestos material may release asbestos fibers, which can be inhaled into the lungs. The fibers can remain there for a long time, increasing the risk of disease. Asbestos material that would crumble easily if handled, or that has been sawed, scraped, or sanded into a powder, is more likely to create a health hazard. 


Where Can I Find Asbestos and When Can it Be a Problem? 
Most products made today do not contain asbestos. Those few products made which still contain asbestos that could be inhaled are required to be labeled as such. However, until the 1970s, many types of building products and insulation materials used in homes contained asbestos. Common products that might have contained asbestos in the past, and conditions which may release fibers, include: 
  • steam pipes, boilers and furnace ducts insulated with an asbestos blanket or asbestos paper tape. These materials may release asbestos fibers if damaged, repaired, or removed improperly;
  • resilient floor tiles (vinyl asbestos, asphalt and rubber), the backing on vinyl sheet flooring, and adhesives used for installing floor tile. Sanding tiles can release fibers, and so may scraping or sanding the backing of sheet flooring during removal;
  • cement sheet, millboard and paper used as insulation around furnaces and wood-burning stoves. Repairing or removing appliances may release asbestos fibers, and so may cutting, tearing, sanding, drilling, or sawing insulation;
  • door gaskets in furnaces, wood stoves and coal stoves. Worn seals can release asbestos fibers during use;
  • soundproofing or decorative material sprayed on walls and ceilings. Loose, crumbly or water-damaged material may release fibers, and so will sanding, drilling or scraping the material;
  • patching and joint compounds for walls and ceilings, and textured paints. Sanding, scraping, or drilling these surfaces may release asbestos fibers;
  • asbestos cement roofing, shingles and siding. These products are not likely to release asbestos fibers unless sawed, dilled or cut;
  • artificial ashes and embers sold for use in gas-fired fireplaces, and other older household products, such as fireproof gloves, stove-top pads, ironing board covers and certain hairdryers; and
  • automobile brake pads and linings, clutch facings and gaskets.


Where Asbestos Hazards May Be Found in the Home
  • Some roofing and siding shingles are made of asbestos cement.
  • Houses built between 1930 and 1950 may have asbestos as insulation.
  • Asbestos may be present in textured paint and in patching compounds used on wall and ceiling joints. Their use was banned in 1977.
  • Artificial ashes and embers sold for use in gas-fired fireplaces may contain asbestos.
  • Older products, such as stove-top pads, may have some asbestos compounds.
  • Walls and floors around wood-burning stoves may be protected with asbestos paper, millboard or cement sheets.
  • Asbestos is found in some vinyl floor tiles and the backing on vinyl sheet flooring and adhesives.
  • Hot water and steam pipes in older houses may be coated with an asbestos material or covered with an asbestos blanket or tape.
  • Oil and coal furnaces and door gaskets may have asbestos insulation.


What Should Be Done About Asbestos in the Home?
If you think asbestos may be in your home, don't panic.  Usually, the best thing to do is to leave asbestos material that is in good condition alone. Generally, material in good condition will not release asbestos fibers. There is no danger unless the asbestos is disturbed and fibers are released and then inhaled into the lungs. Check material regularly if you suspect it may contain asbestos. Don't touch it, but look for signs of wear or damage, such as tears, abrasions or water damage. Damaged material may release asbestos fibers. This is particularly true if you often disturb it by hitting, rubbing or handling it, or if it is exposed to extreme vibration or air flow. Sometimes, the best way to deal with slightly damaged material is to limit access to the area and not touch or disturb it. Discard damaged or worn asbestos gloves, stove-top pads and ironing board covers. Check with local health, environmental or other appropriate agencies to find out proper handling and disposal procedures. If asbestos material is more than slightly damaged, or if you are going to make changes in your home that might disturb it, repair or removal by a professional is needed. Before you have your house remodeled, find out whether asbestos materials are present.  


How to Identify Materials that Contain Asbestos 
You can't tell whether a material contains asbestos simply by looking at it, unless it is labeled. If in doubt, treat the material as if it contains asbestos, or have it sampled and analyzed by a qualified professional. A professional should take samples for analysis, since a professional knows what to look for, and because there may be an increased health risk if fibers are released. In fact, if done incorrectly, sampling can be more hazardous than leaving the material alone. Taking samples yourself is not recommended. If you nevertheless choose to take the samples yourself, take care not to release asbestos fibers into the air or onto yourself. Material that is in good condition and will not be disturbed (by remodeling, for example) should be left alone. Only material that is damaged or will be disturbed should be sampled. Anyone who samples asbestos-containing materials should have as much information as possible on the handling of asbestos before sampling and, at a minimum, should observe the following procedures: 
  • Make sure no one else is in the room when sampling is done.
  • Wear disposable gloves or wash hands after sampling.
  • Shut down any heating or cooling systems to minimize the spread of any released fibers.
  • Do not disturb the material any more than is needed to take a small sample.
  • Place a plastic sheet on the floor below the area to be sampled.
  • Wet the material using a fine mist of water containing a few drops of detergent before taking the sample. The water/detergent mist will reduce the release of asbestos fibers.
  • Carefully cut a piece from the entire depth of the material using a small knife, corer or other sharp object. Place the small piece into a clean container (a 35-mm film canister, small glass or plastic vial, or high-quality resealable plastic bag).
  • Tightly seal the container after the sample is in it. 
  • Carefully dispose of the plastic sheet. Use a damp paper towel to clean up any material on the outside of the container or around the area sampled. Dispose of asbestos materials according to state and local procedures.
  • Label the container with an identification number and clearly state when and where the sample was taken.
  • Patch the sampled area with the smallest possible piece of duct tape to prevent fiber release.
  • Send the sample to an asbestos analysis laboratory accredited by the National Voluntary Laboratory Accreditation Program (NVLAP) at the National Institute of Standards and Technology (NIST). Your state or local health department may also be able to help.  


How to Manage an Asbestos Problem 
If the asbestos material is in good shape and will not be disturbed, do nothing! If it is a problem, there are two types of corrections: repair and removal. Repair usually involves either sealing or covering asbestos material. Sealing (encapsulation) involves treating the material with a sealant that either binds the asbestos fibers together or coats the material so that fibers are not released. Pipe, furnace and boiler insulation can sometimes be repaired this way. This should be done only by a professional trained to handle asbestos safely. Covering (enclosure) involves placing something over or around the material that contains asbestos to prevent the release of fibers. Exposed insulated piping may be covered with a protective wrap or jacket. With any type of repair, the asbestos remains in place. Repair is usually cheaper than removal, but it may make removal of asbestos later (if found to be necessary) more difficult and costly. Repairs can either be major or minor. Major repairs must be done only by a professional trained in methods for safely handling asbestos. Minor repairs should also be done by professionals, since there is always a risk of exposure to fibers when asbestos is disturbed.

 
Repairs  
Doing minor repairs yourself is not recommended, since improper handling of asbestos materials can create a hazard where none existed. If you nevertheless choose to do minor repairs, you should have as much information as possible on the handling of asbestos before doing anything. Contact your state or local health department or regional EPA office for information about asbestos training programs in your area. Your local school district may also have information about asbestos professionals and training programs for school buildings. Even if you have completed a training program, do not try anything more than minor repairs. Before undertaking minor repairs, carefully examine the area around the damage to make sure it is stable. As a general rule, any damaged area which is bigger than the size of your hand is not considered a minor repair. 
 
Before undertaking minor repairs, be sure to follow all the precautions described previously for sampling asbestos material. Always wet the asbestos material using a fine mist of water containing a few drops of detergent. Commercial products designed to fill holes and seal damaged areas are available. Small areas of material, such as pipe insulation, can be covered by wrapping a special fabric, such as re-wettable glass cloth, around it. These products are available from stores (listed in the telephone directory under "Safety Equipment and Clothing") which specialize in asbestos materials and safety items. 

Removal is usually the most expensive method and, unless required by state or local regulations, should be the last option considered in most situations. This is because removal poses the greatest risk of fiber release. However, removal may be required when remodeling or making major changes to your home that will disturb asbestos material. Also, removal may be called for if asbestos material is damaged extensively and cannot be otherwise repaired. Removal is complex and must be done only by a contractor with special training. Improper removal may actually increase the health risks to you and your family. 


Asbestos Professionals: Who Are They and What Can They Do?  
Asbestos professionals are trained in handling asbestos material. The type of professional will depend on the type of product and what needs to be done to correct the problem. You may hire a general asbestos contractor or, in some cases, a professional trained to handle specific products containing asbestos. 
 
Asbestos professionals can conduct inspections, take samples of suspected material, assess its condition, and advise on the corrections that are needed, as well as who is qualified to make these corrections. Once again, material in good condition need not be sampled unless it is likely to be disturbed. Professional correction or abatement contractors repair and remove asbestos materials. 
 
Some firms offer combinations of testing, assessment and correction. A professional hired to assess the need for corrective action should not be connected with an asbestos-correction firm. It is better to use two different firms so that there is no conflict of interest. Services vary from one area to another around the country. 
 
The federal government offers training courses for asbestos professionals around the country. Some state and local governments also offer or require training or certification courses. Ask asbestos professionals to document their completion of federal or state-approved training. Each person performing work in your home should provide proof of training and licensing in asbestos work, such as completion of EPA-approved training. State and local health departments or EPA regional offices may have listings of licensed professionals in your area. 
 
If you have a problem that requires the services of asbestos professionals, check their credentials carefully. Hire professionals who are trained, experienced, reputable and accredited -- especially if accreditation is required by state or local laws. Before hiring a professional, ask for references from previous clients. Find out if they were satisfied. Ask whether the professional has handled similar situations. Get cost estimates from several professionals, as the charges for these services can vary. 

Though private homes are usually not covered by the asbestos regulations that apply to schools and public buildings, professionals should still use procedures described in federal or state-approved training. Homeowners should be alert to the chance of misleading claims by asbestos consultants and contractors. There have been reports of firms incorrectly claiming that asbestos materials in homes must be replaced. In other cases, firms have encouraged unnecessary removal or performed it improperly. Unnecessary removal is a waste of money. Improper removal may actually increase the health risks to you and your family. To guard against this, know what services are available and what procedures and precautions are needed to do the job properly. 

In addition to general asbestos contractors, you may select a roofing, flooring or plumbing contractor trained to handle asbestos when it is necessary to remove and replace roofing, flooring, siding or asbestos-cement pipe that is part of a water system. Normally, roofing and flooring contractors are exempt from state and local licensing requirements because they do not perform any other asbestos-correction work.

Asbestos-containing automobile brake pads and linings, clutch facings and gaskets should be repaired and replaced only by a professional using special protective equipment. Many of these products are now available without asbestos.
 

If you hire a corrective-action contractor:
  • Check with your local air pollution control board, the local agency responsible for worker safety, and the Better Business Bureau. Ask if the firm has had any safety violations. Find out if there are legal actions filed against it.
  • Insist that the contractor use the proper equipment to do the job. The workers must wear approved respirators, gloves and other protective clothing.
  • Before work begins, get a written contract specifying the work plan, cleanup, and the applicable federal, state and local regulations which the contractor must follow (such as notification requirements and asbestos disposal procedures). Contact your state and local health departments, EPA regional office, and the Occupational Safety and Health Administration's regional office to find out what the regulations are. Be sure the contractor follows local asbestos removal and disposal laws. At the end of the job, get written assurance from the contractor that all procedures have been followed.
  • Assure that the contractor avoids spreading or tracking asbestos dust into other areas of your home. They should seal off the work area from the rest of the house using plastic sheeting and duct tape, and also turn off the heating and air conditioning system. For some repairs, such as pipe insulation removal, plastic bags may be adequate. They must be sealed with tape and properly disposed of when the job is complete.
  • Make sure the work site is clearly marked as a hazardous area. Do not allow household members or pets into the area until work is completed.
  • Insist that the contractor apply a wetting agent to the asbestos material with a hand sprayer that creates a fine mist before removal. Wet fibers do not float in the air as easily as dry fibers and will be easier to clean up.
  • Make sure the contractor does not break removed material into smaller pieces. This could release asbestos fibers into the air. Pipe insulation was usually installed in pre-formed blocks and should be removed in complete pieces.
  • Upon completion, assure that the contractor cleans the area well with wet mops, wet rags, sponges and/or HEPA (high-efficiency particulate air) vacuum cleaners. A regular vacuum cleaner must never be used. Wetting helps reduce the chance of spreading asbestos fibers in the air. All asbestos materials and disposable equipment and clothing used in the job must be placed in sealed, leakproof, and labeled plastic bags. The work site should be visually free of dust and debris. Air monitoring (to make sure there is no increase of asbestos fibers in the air) may be necessary to assure that the contractor's job is done properly. This should be done by someone not connected with the contractor. 


Caution! 
Do not dust, sweep or vacuum debris that may contain asbestos. These actions will disturb tiny asbestos fibers and may release them into the air. Remove dust by wet-mopping or with a special HEPA vacuum cleaner used by trained asbestos contractors.

For questions concerning property inspections, or to schedule your property inspection, contact Bennett Property Inspection today at (813) 260-9920.

Article Source:InterNACHI


0 Comments

Buying a 50's Home

2/4/2015

0 Comments

 
Are you considering purchasing an older home? Maybe you have plans of restoring it to its former glory. There are some things to be aware of when deciding to move forward with the purchase of an older home. When Bennett Property Inspection inspects an older home, for example a home built in the 1950’s we are doing this inspection in the context of the time period in which it was built, but balancing it against contemporary, acceptable building practices, and the general quality of the home.

Experience counts for a lot in evaluating older structures when you’re less familiar with the building practices and codes used for building the home. If your inspector has looked at many older homes, then they will have a much better your understanding of what was considered acceptable at the time the home was built.

The laws of physics haven’t changed with time, however, so many things that make a building safe or unsafe haven’t changed either. Older buildings, especially those that have been poorly maintained, present good opportunities to study the failures and successes of the various home materials and systems.

The elements that cause the deterioration of different home components have had longer to work on older homes. We use keen eyes and pay special attention at parts of the home that are exposed to the elements, such as the foundation, wall coverings and roof.

Foundation
The foundation is probably the main priority, since it’s the component that bears the load of the entire home. Foundation failure or repairs can be especially expensive, and parts of it may be hidden.  

Wall Coverings
The wall coverings often provide clues to any foundation movement. Soil or foundation movement typically shows up as diagonal cracks emanating from the corners of doors and windows. You may also see stepped cracking in masonry walls, especially near exterior corners or below windows.

Roof
The roofs of older homes in our area are typically shingles or tile. Often, the roof of an older home will need replacement soon, the owner or potential buyer may be facing not just removal of existing layers, but installation of solid roof sheathing over the original dimensional sheathing that was typically installed with older roofs in our area.

Structure
Older homes may have undergone work by someone not familiar with acceptable building practices. Although it’s often difficult to see floor and wall framing, we look for problems such as the structure being out of plumb, out of level, or not flat.
The work done may also have employed methods quite different from modern methods, so just because it looks different there maybe nothing wrong with it. It might just be a reflection of the era it was built in. We will look for theses types of issues and if they pose a concern.

Exterior
When lead was used as an ingredient in the manufacture of paint, the exterior paint coating would eventually oxidize, and a lead powder would form on the surface, ultimately washing into the soil around the home's exterior by the rain. Over time, lead can accumulate in the soil to a level at which it represents a health risk to children and pets. A lead test of the soil of the home's perimeter can be performed if its a concern of the potential buyer.

Windows
It’s often difficult to tell whether a window is original, and it’s a question that’s often asked. At Bennett Property Inspection, its our job to describe the window's condition. We look for failure of the finish coating and decay on wood-frame windows, especially in the corners of the sill. You’ll be checking for hardware condition, and proper operation of the hardware and window itself. Single panes are not a defect.

Electrical Systems
In inspecting an older home, we may find that the electrical system is original, that it’s new, or that it has had work done on it over the years. It’s not unusual to find electrical components from multiple eras in one home. They may all be energized, or they may be partially energized.

When we are confronted with these older systems, we recommend a specialist inspection by a qualified electrical contractor. The liability connected with electrical systems is high, since these can burn down the home or cause serious or fatal injury.

Plumbing Systems
There are still a few homes around with galvanized supply pipes, so we will check for functional flow at fixtures. Also, we will alert you to any unsafe conditions, such as missing or obsolete traps. In the past, lead distribution pipes have been a problem, but very few currently exist any longer.

Heating Systems
Serious problems can develop from poorly understood venting of furnaces and water heaters. Condensation is one problem. Water is a solvent and will deteriorate many materials. 

Where heating equipment has been vented through older brick chimneys, we will look for damage to the brick at the exterior, at the interior, and to the lining. We will also be checking for proper cleanouts, and if the chimney has a lining.

Toxic Materials
Sometimes we encounter toxic materials when inspecting older homes. Asbestos-like material on heating system exhaust ducts is something we most certainly look for and alert the client to. Asbestos was also used in vinyl products, such as flooring, and in the process of manufacturing roofing tiles. The amount of asbestos in thermal insulation has been exaggerated, but most thermal insulation releases particulates into the air when it’s disturbed, so you should wear a respirator in attics and crawlspaces where you may encounter exposure.

For questions concerning property inspections, or to schedule your property inspection, contact Bennett Property Inspection today at (813) 260-9920.

Picture
Better Homes and Gardens 1958
0 Comments

The Ins & Outs Of Knob & Tube Wiring

1/5/2015

0 Comments

 
Picture
Knob-and-tube (K&T) wiring was an early standardized method of electrical wiring in buildings, in common use in North America from about 1880 to the 1940s. The system is considered obsolete and can be a safety hazard, although some of the fear associated with it is undeserved.
InterNACHI inspectors should always disclaim knob-and-tube wiring during their inspections.

Facts About Knob-and-Tube Wiring:

  • It is not inherently dangerous. The dangers from this system arise from its age, improper modifications, and situations where building insulation envelops the wires.
  • It has no ground wire and thus cannot service any three-pronged appliances.
  • While it is considered obsolete, there is no code that requires its complete removal.
  • It is treated differently in different jurisdictions. In some areas, it must be removed at all accessible locations, while others merely require that it not be installed in new construction.
  • It is not permitted in any new construction.
How Knob-and-Tube Wiring Works:           

K&T wiring consists of insulated copper conductors passing through lumber framing drill-holes via protective porcelain insulating tubes. They are supported along their length by nailed-down porcelain knobs. Where wires enter a wiring device, such as a lamp or switch, or were pulled into a wall, they are protected by flexible cloth or rubber insulation called "loom."

Advantages of Knob-and-Tube Wiring:

  • K&T wiring has a higher ampacity than wiring systems of the same gauge. The reason for this is that the hot and neutral wires are separated from one another, usually by 4 to 6 inches, which allows the wires to readily dissipate heat into free air.
  • K&T wires are less likely than Romex cables to be punctured by nails because K&T wires are held away from the framing.
  • The porcelain components have an almost unlimited lifespan.
  • The original installation of knob-and-tube wiring is often superior to that of modern Romex wiring. K&T wiring installation requires more skill to install than Romex and, for this reason, unskilled people rarely ever installed it.
Problems Associated with K&T Wiring:

  • Unsafe modifications are far more common with K&T wiring than they are with Romex and other modern wiring systems. Part of the reason for this is that K&T is so old that more opportunity has existed for improper modifications.
  • The insulation that envelopes the wiring is a fire hazard.
  • It tends to stretch and sag over time.
  • It lacks a grounding conductor. Grounding conductors reduce the chance of electrical fire and damage to sensitive equipment.
  • In older systems, wiring is insulated with varnish and fiber materials that are susceptible to deterioration.
Compared with modern wiring insulation, K&T wiring is less resistant to damage.  K&T wiring insulated with cambric and asbestos is not rated for moisture exposure. Older systems contained insulation with additives that may oxidize copper wire. Bending the wires may cause insulation to crack and peel away. 

K&T wiring is often spliced with modern wiring incorrectly by amateurs. This is perhaps due to the ease by which K&T wiring is accessed.

Building Insulation:

K&T wiring is designed to dissipate heat into free air, and insulation will disturb this process. Insulation around K&T wires will cause heat to build up, and this creates a fire hazard. The 2008 National Electrical Code (NEC) requires that this wiring system not be covered by insulation. Specifically, it states that this wiring system should not be in…

hollow spaces of walls, ceilings and attics where such spaces are insulated by loose, rolled or foamed-in-place insulating material that envelops the conductors.

Local jurisdictions may or may not adopt the NEC’s requirement. The California Electrical Code, for instance, allows insulation to be in contact with knob-and-tube wiring, provided that certain conditions are met, such as, but not limited to, the following:

  • A licensed electrical contractor must certify that the system is safe.
  • The certification must be filed with the local building department.
  • Accessible areas where insulation covers the wiring must be posted with a warning sign. In some areas, this sign must be in Spanish and English.
  • The insulation must be non-combustible and non-conductive.
  • Normal requirements for insulation must be met.
Modifications:

When K&T wiring was first introduced, common household electrical appliances were limited to little more than toasters, tea kettles, coffee percolators and
clothes irons. The electrical requirements of mid- to late-20thcentury homes
could not have been foreseen during the late 18th century, a time during which electricity, to many, was seen as a passing fad. Existing K&T systems are notorious for modifications made in an attempt to match the increasing amperage loads required by televisions, refrigerators, and a plethora of other electric appliances. Many of these attempts were made by insufficiently trained handymen, rather than experienced electricians, whose work made the wiring system vulnerable to overloading.
  • Many homeowners adapted to the inadequate amperage of K&T wiring by installing fuses with resistances that were too high for the wiring. The result of this modification is that the fuses would not blow as often and the wiring would suffer heat damage due to excessive amperage loads.
  • It is not uncommon for inspectors to find connections wrapped with masking tape or Scotch tape instead of electrical tape.
K&T Wiring and Insurance:

Many insurance companies refuse to insure houses that have knob-and-tube wiring due to the risk of fire. Exceptions are sometimes made for houses where an electrical contractor has deemed the system to be safe.

Advice for those with K&T wiring:

  • Have the system evaluated by a qualified electrician. Only an expert can confirm that the system was installed and modified correctly.
  • Do not run an excessive amount of appliances in the home, as this can cause a fire.
  • Where the wiring is brittle or cracked, it should be replaced. Proper maintenance is crucial.
  • K&T wiring should not be used in kitchens, bathrooms, laundry rooms or outdoors. Wiring must be grounded in order to be used safely in these locations.
  • Rewiring a house can take weeks and cost thousands of dollars, but unsafe wiring can cause fires, complicate estate transactions, and make insurers skittish.
  • Homeowners should carefully consider their options before deciding whether to rewire their house.
  • The homeowner or an electrician should carefully remove any insulation that is found surrounding K&T wires.
  • Prospective home buyers should get an estimate of the cost of replacing K&T wiring. They can use this amount to negotiate a cheaper price for the house.
In summary, knob-and-tube wiring is likely to be a safety hazard due to improper modifications and the addition of building insulation. Inspectors need to be wary of this old system and be prepared to inform their clients about its potential dangers. 
 
For questions concerning property inspections, or to schedule your property inspection, contact Bennett Property Inspection today at (813) 260-9920.

0 Comments

Want To Save $440 A Year? Hug A Tree

12/16/2014

0 Comments

 
Picture
One of the easiest ways to reduce solar heat gain and subsequent energy costs is as simple as planting a tree. The strategic placement of trees, known as landscape shading or tree shading, is a technique used to provide shade from the warm summer sun. Unobstructed solar heat can significantly increase indoor air temperature, which will frustrate efforts to keep the house cool. However, appropriate tree placement can reduce indoor temperatures by up to 9° F(12° C) through evapotranspiration -- the process by which a plant releases water vapor -- as well as the shade provided by the tree.
 
According to the U.S. Department of Energy (DOE), air temperatures directly under trees can be as much as 25° cooler than air temperatures above nearby blacktop. Also, shade trees can reduce cooling costs by as much as 10%, which is important because the average home devotes almost a fifth of its energy expenditure to cooling.

Researchers from the National Institute of Standards and Technology and the U.S. Department of Agriculture conducted the first large-scale study on landscape shading in 2007.  In Sacramento, Calif., 460 houses were studied over the summer to discover whether well-placed shade trees could reduce energy costs, as well as atmospheric carbon. Their specific findings were as follows:
  • Trees planted on the west and south sides of a house decreased summertime electricity use, while trees planted on the north actually increased energy consumption.  Trees planted on the east side had no effect.
  • Fast-growing trees are better energy-savers than slower-growing trees.
  • Placement of the trees, particularly their proximity to the house, is a significant factor in their effectiveness as shade trees.
The DOE offers valuable tips for homeowners seeking to employ landscape shading strategies. They have determined that almost any shading application can be accomplished by selecting tree species with the appropriate sizes, densities and shapes. Follow their recommendations below for specific applications.

  • Dense evergreen trees and shrubs will provide continuous shade and block heavy winds.
  • Deciduous trees can be used to block solar heat in the summer while they let much of it in during the winter. In the summer, the leaves of deciduous trees will protect the home from the heat of the sun, and in the cold of winter, the leaves will fall from the trees and allow the sunlight to keep your home warmer.
  • Shrubs and ground cover plants can be used to shade the ground and pavement around the home. Use a large bush or row of shrubs to shade a patio or driveway. Plant a hedge to shade a sidewalk. Build a trellis for climbing vines to shade a patio area.
  • Vines can shade walls quickly, often during their first growing season. A lattice or trellis with climbing vines, or a planter box with trailing vines, will shade the home's perimeter while admitting cooling breezes to the shaded area.
  • Shrubs planted close to the house will fill in rapidly and begin shading walls and windows within a few years.


Other considerations for the homeowner:

  • To effectively employ landscape shading, you must plan out the location, size and shape of the shadows cast by your trees and shrubs.
  • Get to know your climate and microclimate before attempting to reduce energy bills through landscape shading. Homes in cool regions may not require any shading, while other homes may require only moderate shading. 
  • Fast-growing trees will begin shading your house quickly, but slow-growing trees will generally live longer. They are also more drought- and insect-resistant while less being prone to limb breakage by windstorms due to their deep root structure. A 6-foot to 8-foot (1.8-meter to 2.4-meter) deciduous tree will shade the roof in five to 10 years, depending on the species and the home. The Southern magnolia, for instance, will grow relatively slowly but will eventually reach an impressive 30 feet high, supported by a deep and sturdy root structure. Meanwhile, the faster-growing cherry plum will rise to a height of a more modest 20 feet.
  • If wetness and humidity are already a problem, it might make the issue worse to allow dense foliage to grow immediately next to your home. Well-landscaped homes in wet areas allow winds to flow around the home, keeping the home and its surrounding soil reasonably dry. Be sure to ask your InterNACHI inspector during your next scheduled inspection about moisture-related problems in your home.
  • Aesthetics can be enhanced through landscape shading. Vines, in particular, are functional elements that can greatly augment a home’s historical or natural appeal.
In summary, landscape shading can be used to reduce energy bills and enhance a home’s appearance, but the cost of the trees themselves, as well as their physical properties and location, should be carefully planned. 

Savings will vary, depending on where you live, but a mature tree that was strategically placed has shown to trim cooling costs by as much as $400 per year. 

For questions concerning property inspections, or to schedule your property inspection, contact Bennett Property Inspection today at (813) 260-9920.

Article Source:InterNACHI

0 Comments

Sweating Windows

12/10/2014

0 Comments

 
Picture
Winter in Florida equals condensation season for many homeowners. Condensation is the accumulation of water on relatively cold surfaces. 

Here is your physical science lesson for the day: almost all air contains water vapor, the gas phase of water composed of tiny water droplets. The molecules in warm air are far apart from one another and allow the containment of a relatively large quantity of water vapors. As air cools, its molecules get closer together and squeeze the tiny vapor droplets closer together, as well. A critical temperature, known as the dew point, exists where these water droplets will be forced so close together that they merge into visible liquid in a process called condensation.

The best way to describe this condition is with a soda can analogy. Pull an ice cold soda can out of the cooler in a warm house and let it sit for a while. What happens? The can begins to form little beads of sweat, and that is the same principle behind a sweating window. This type of situation can often be seen by the temperature imbalance between the inside and outside portions of old, inefficient windows, a large majority being aluminum windows.

Sweating windows are a common and prevalent problem in Florida. Many builders believed that insulated, energy-efficient windows were not necessary in this warm climate. In fact, most said it was a waste of money. This line of thinking changed in 2010 when Florida adopted a new building energy code that mandates energy-saving improvement in many areas of a home, especially windows. Aluminum framed windows can still be used when building a home, but energy efficiency must be created in other areas of the home through a complicated energy calculation.

Temporary Condensation

There are several ways to tell if the condensation on your windows is temporary.  Does condensation usually form:
  • during baths and showers, cooking, dish washing, laundry, or other steam producing occasions?
  • during the start of each heating season? Houses absorb moisture during humid summers. This will dry out after a few weeks of heating.
  • during sharp temperature changes? Sudden drops in temperature, especially during the heating season, can create temporary condensation.
  • during new construction or remodeling? Building materials contain a great deal of moisture.  When the heat is turned on, this moisture will flow into the air inside the home. It usually will disappear after the first heating season.

Problem Condensation

Excess moisture in your home may eventually cause problems. It may be time to take action if you notice the following signs in your house:
  • Condensation remains on windows throughout the day, even when the outside temperature has warmed up. 
  • Condensation is forming and running down the walls. It may also be causing discoloration, staining, peeling wallpaper and blistering paint.
  • The air smells musty – this could indicate mold, mildew, or in the worst cases, rot – or odors from everyday household activities that linger too long. Odors increase in intensity with high relative humidity.
  • Mold, mildew, rot and/or decay are visible. Mold and mildew thrive in most areas and can cause health and house damage.

Window Condensation Solutions

1. Reduce Moisture Sources
  • Stop or severely limit the use of humidifiers, or adjust them to the appropriate setting.
  • Run a dehumidifier if needed.
  • Limit plants, aquariums, and pets. If you care for a lot of plants, group them in one sunny room and avoid over watering.
  • Have your gas appliances checked, if you have not recently. Malfunctioning gas appliances can deliver excessive water vapor into the air along with more dangerous contaminants. Be sure you have a carbon monoxide alarm.
  • Store firewood outside.
  • Eliminate plumbing leaks.
  • Don’t air-dry clothes indoors.
  • Correct grading and drainage problems around exterior of your home.

2. Increase Ventilation
  • Open windows for a few minutes each day, particularly after steam-producing activities such as showering/bathing, laundry, and cooking. Heat loss will be minimal.
  • Run kitchen, bathroom, and other fans longer and more often.
  • Improve or add a ventilation system in your home through attic, roof and soffit venting. Ensure that everything vents to the outside.
  • Open blinds and drapes. Heavy window coverings restrict the flow of warm air over the interior glass surface.
  • Operate ceiling fans to improve air circulation.

3. Increase Air Temperature
  • Raise the temperature inside the house.
  • Insulate under the seat and over the head of bay, bow, and garden windows to keep window area warmer.
  • Direct warm-air supply ducts toward windows or even use a fan for increased air circulation at windows.

For questions concerning property inspections, or to schedule your property inspection, contact Bennett Property Inspection today at (813) 260-9920.

0 Comments

Three Essential Questions For Your Home Inspector

11/12/2014

0 Comments

 
Picture
Buying a home is a huge decision and a financial undertaking large enough to warrant a thorough and detailed home inspection.  A buyer needs a qualified home inspector to seek out the problems that maybe present with the home before moving in. If there is a problem or a symptom of a problem the home inspector will include a description of that problem in a written report and may recommend further evaluation.

Before you close the deal on your new purchase, enlist the help of Bennett Property Inspection out of Tampa, Florida.
We care about your best interests, your families safety, and we will be an advocate on your behalf during your home buying process.

Ask any prospective home inspector these three questions before using their services:


1.   What does the report look like?  The most valuable part of the home inspection is the detailed report that lists any issues, problems or potential trouble with the house. How the report is crafted and how long it takes to be submitted to the buyer varies. Our inspection report is a full narrative report with embedded pictures. The full report usually contains between 30 and 40 pages. The summary report, presenting findings that may require immediate attention, usually contains between 5 and 10 pages.

2.   What will the inspection cover? A home inspector's report will review the condition of the home's heating system, central air conditioning system (temperature permitting), interior plumbing, electrical systems, roof, attic, visible insulation, walls, ceilings, floors, windows, doors, foundation, basement, and visible structure.    

3.   How do you stay current on industry standards? The building industry is constantly changing, so you don’t want to seek help from a company with dated practices. A good inspector has consistent documentation of continuing education (CE) in the inspection industry.


For more questions concerning home inspections, or to schedule your inspection, contact Bennett Property Inspection at (813) 260-9920.


0 Comments
<<Previous

    Author

    Kevin Bennett is a West Coast transplant now living in sunny Tampa, FL. He is a licensed home inspector, former General Contractor and a residential and commercial construction expert. He is married, has a ten year old daughter named Stella, a six year old son named Logan, and an old hound dog named Jackson.

    Archives

    March 2015
    February 2015
    January 2015
    December 2014
    November 2014
    October 2014
    June 2014
    April 2014
    March 2014

    Categories

    All
    Buying A Home
    Energy Savings
    Home Maintenance
    Home Safety
    Inspector Questions
    Insurance
    Old Homes
    Seasonal

    RSS Feed

HOME INSPECTION SERVICES FOR:

Hillsborough, Pinellas, Pasco, Manatee | hyde park | beach park | tampa | odessa | ybor city | palma ceia | avila | citrus park | tampa palms | hunters green | south tampa | davis islands | st. petersburg| harbour island | new tampa | temple terrace | lutz | brandon| keystone | sunset park | northdale | bayshore | seminole heights | channelside | carrollwood | culbreath isles | clearwater| rocky point | wesley chapel| bayshore beautiful | ballast point | virginia park | wellswood | downtown tampa | river heights | riverview| port tampa | westchase community | fish hawk community | inland homes | town'n country | lakewood ranch |north river ranch | bexley | starkey ranch | epperson | mirada

NAVIGATION

Home
Pricing
Inspection Services
About
About the Inspection
Contact the Inspector
Blog
Rescources

Picture
4106 W San Juan St, Tampa, FL 33629
(813) 260-9920 Call or Text
bennettpropertyinspection@gmail.com

Contact Form

Picture
Proudly powered by Weebly